Design Inspiration

Subway tile and dark cabinets are a classic combination that can create a variety of kitchen styles, from modern and minimalist to traditional and farmhouse. This pairing offers a timeless aesthetic that never goes out of style.
Subway tile with dark cabinets – The combination of subway tile and dark cabinets creates a sophisticated and visually appealing contrast. The light-colored tile brightens the space, while the dark cabinets add depth and dimension. This creates a balanced and harmonious look that is both stylish and functional.
The subway tile with dark cabinets felt strangely out of place in the old farmhouse, a stark contrast to the worn wood and faded floral wallpaper. It was as if a modern ghost had wandered into a forgotten dream. Perhaps a touch of rustic charm was needed, something to soften the edges and evoke the warmth of a bygone era.
Country shabby chic bedroom ideas might be the answer, with their delicate lace, distressed furniture, and soft pastel hues. But could such a delicate touch truly tame the starkness of the subway tile and dark cabinets? Only time, and perhaps a whisper of the past, would tell.
Examples of Kitchen Designs
There are many different ways to incorporate subway tile and dark cabinets into a kitchen design. Here are some examples of different styles and color palettes:
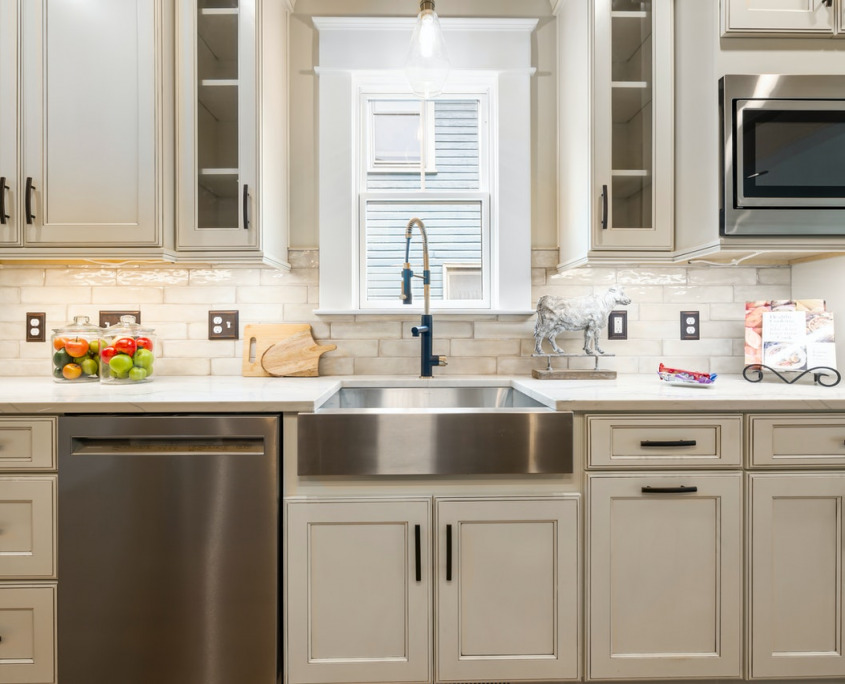
- Modern and Minimalist: A white subway tile backsplash paired with dark gray or black cabinets creates a clean and contemporary look. The use of stainless steel appliances and sleek countertops complements the modern aesthetic.
- Traditional: A cream-colored subway tile backsplash paired with dark wood cabinets creates a warm and inviting traditional kitchen. The use of brass hardware and natural stone countertops adds to the traditional feel.
- Farmhouse: A white subway tile backsplash paired with dark blue or green cabinets creates a rustic and charming farmhouse style. The use of open shelving, distressed wood accents, and natural materials adds to the farmhouse aesthetic.
Benefits of Using Subway Tile and Dark Cabinets
There are many benefits to using subway tile and dark cabinets in a kitchen design. Here are some of the key advantages:
- Timeless Style: The combination of subway tile and dark cabinets is a classic design choice that never goes out of style. This ensures that your kitchen will remain stylish for years to come.
- Visual Contrast: The light-colored tile and dark cabinets create a striking visual contrast that adds depth and dimension to the space.
- Modern and Sophisticated: This combination can create a modern and sophisticated look, especially when paired with sleek countertops and appliances.
- Versatility: Subway tile and dark cabinets can be incorporated into a variety of kitchen styles, from traditional to modern.
Enhancing the Overall Aesthetic, Subway tile with dark cabinets
The combination of subway tile and dark cabinets can enhance the overall aesthetic of a kitchen in several ways:
- Creating a Focal Point: The dark cabinets can create a focal point in the kitchen, drawing the eye to the cabinetry and adding visual interest.
- Adding Depth and Dimension: The contrast between the light tile and dark cabinets adds depth and dimension to the space, making it feel larger and more inviting.
- Balancing Light and Dark: The light-colored tile helps to brighten the space, while the dark cabinets add a sense of grounding and stability. This creates a balanced and harmonious look.
Material Considerations

Choosing the right materials for your subway tile and cabinets is crucial for achieving a stylish and durable kitchen. You need to consider the look, feel, and practicality of each material, ensuring they complement each other and suit your lifestyle.
Subway Tile Materials
Subway tiles come in various materials, each with its own advantages and disadvantages. Let’s delve into the key differences:
- Ceramic: The most common and affordable option, ceramic tiles are known for their durability and versatility. They come in a wide range of colors, patterns, and finishes. However, they can be prone to chipping or cracking if not handled carefully.
- Porcelain: More dense and durable than ceramic, porcelain tiles are less porous and resistant to stains and scratches. They also boast a wider variety of colours and patterns, making them a popular choice for kitchens.
- Glass: Glass subway tiles add a touch of elegance and sophistication to any kitchen. They are highly resistant to stains and scratches, making them easy to clean. However, they can be more expensive than ceramic or porcelain and may require more care to prevent damage.
Subway Tile Finishes
The finish of your subway tile significantly impacts its appearance and functionality:
- Glossy: Glossy finishes reflect light, creating a bright and modern look. They are easy to clean but can show fingerprints and smudges more readily.
- Matte: Matte finishes offer a softer, more subdued appearance, hiding imperfections and fingerprints. They can create a more rustic or traditional feel.
- Textured: Textured finishes add dimension and visual interest to your kitchen. They can be more challenging to clean but offer a unique and tactile experience.
Cabinet Materials and Finishes
The choice of cabinet material and finish should complement your subway tile and create a cohesive look.
- Wood: Wood cabinets are classic and timeless, offering warmth and character. They come in various wood species, each with its own grain pattern and color. You can choose from different finishes, such as painted, stained, or lacquered, to create the desired look.
- Laminate: Laminate cabinets are a budget-friendly option that offers durability and resistance to scratches and stains. They are available in a wide range of colors and finishes, mimicking the look of wood or other materials.
- Thermofoil: Thermofoil cabinets are made with a plastic laminate applied over MDF or plywood. They are easy to clean and resistant to moisture, making them suitable for kitchens. Thermofoil cabinets often come in solid colors or with a woodgrain finish.
- Painted: Painted cabinets offer endless possibilities for customization. You can choose any color to match your style and create a bold statement. Painted cabinets can be high-gloss, semi-gloss, or matte, depending on your preference.
Layout and Installation: Subway Tile With Dark Cabinets
Subway tile and dark cabinets are a classic combo that can make your kitchen look super chic and modern. But getting the layout and installation right is key to making it work.
Kitchen Layout Ideas
Here are some layout ideas that can make your kitchen look sick:
- Subway tile backsplash with dark cabinets: This is a classic combo that can work in any kitchen. You can go for a simple layout with the tile running horizontally, or get more creative with a herringbone pattern. The dark cabinets will provide a nice contrast to the light tile, making the kitchen look spacious and bright.
- Subway tile accent wall with dark cabinets: If you want to make a statement, you can use subway tile to create an accent wall in your kitchen. This could be behind the sink, stove, or even the whole wall. The dark cabinets will help to ground the accent wall and prevent it from looking too busy.
- Subway tile island with dark cabinets: If you have a kitchen island, you can use subway tile to create a unique look. You can choose to tile the whole island, or just the backsplash. The dark cabinets will provide a nice contrast to the light tile, making the island stand out.
Installing Subway Tile
Installing subway tile can seem daunting, but it’s actually pretty straightforward. Here’s what you need to know:
Tools and Materials
- Tile cutter: This is essential for cutting the tile to size. You can choose from a manual tile cutter, a wet saw, or a diamond blade grinder.
- Mortar: This is the adhesive that will hold the tile to the wall. Make sure to choose a mortar that’s specifically designed for tile.
- Grout: This is the material that will fill the gaps between the tiles. Choose a grout color that complements the tile and the cabinets.
- Sealer: This will help to protect the grout from stains and water damage. Apply a sealer after the grout has cured.
- Level: This will help you ensure that the tile is installed evenly.
- Spacers: These will help you maintain consistent gaps between the tiles.
- Bucket: This is for mixing the mortar and grout.
- Trowel: This is for applying the mortar to the wall.
- Grout float: This is for applying the grout to the gaps between the tiles.
- Sponge: This is for cleaning up excess grout.
Safety Precautions
- Wear safety glasses: This will protect your eyes from flying debris.
- Wear gloves: This will protect your hands from the mortar and grout.
- Work in a well-ventilated area: This will prevent you from inhaling dust and fumes.
Step-by-Step Installation
- Prepare the wall: Make sure the wall is clean, smooth, and free of any debris. You may need to apply a primer to help the mortar adhere to the wall.
- Lay out the tile: Before you start installing the tile, it’s a good idea to lay out the tiles on the floor to get an idea of how they will look. This will also help you to determine how much tile you need and how to cut the tiles.
- Apply the mortar: Use a trowel to apply a thin layer of mortar to the wall. Make sure the mortar is evenly distributed.
- Install the tile: Press the tile into the mortar, making sure it’s level. Use spacers to maintain consistent gaps between the tiles.
- Let the mortar cure: Allow the mortar to cure for at least 24 hours before grouting.
- Apply the grout: Use a grout float to apply the grout to the gaps between the tiles. Make sure the grout is evenly distributed and that the gaps are completely filled.
- Clean up the grout: Use a sponge to clean up any excess grout. Make sure to wipe the tiles clean.
- Let the grout cure: Allow the grout to cure for at least 24 hours before sealing.
- Apply the sealer: Apply a sealer to the grout to protect it from stains and water damage.
“Installing subway tile can be a bit of a pain, but it’s definitely worth it in the end. Just make sure you take your time and follow the instructions carefully.”
The stark contrast of subway tile with dark cabinets can create a sense of drama in a bedroom, evoking a feeling of hidden depths. If you’re looking to explore this aesthetic further, best bedroom ideas 2017 offer a wealth of inspiration.
Perhaps a vintage-inspired headboard or a statement rug could amplify the mood, creating a space that whispers of secrets and intrigue. After all, a bedroom is a sanctuary, and what better way to invite relaxation than with a touch of mystery?
